|
My mom thought learning to make a few meals would be a very practical skill. I decided to make three different meals (all with the same type of meat - chicken in this case - for continuity) with a main dish and a cooked vegetable. I chose the recipes after discussing ideas with my mom and looking through her frequently-used recipe cards. My first dish is Chicken Parmesan - a dish I've always enjoyed. A few days prior to this, I went online and helped my mom order the groceries to include these items. Since we were planning on having a busy weeknight, we made the majority of this recipe on a Saturday and then cooked it on Monday. To begin, my mom explained that the frozen (skinless and boneless) chicken breasts needed to be thawed. I pulled them out of the freezer and set them on the counter for an hour to do that. Without my mom teaching me this, I would not have known to do that. I probably would have tried to microwave it - which would have been much messier and more time consuming. After the chicken breasts had softened, my mom showed me how to cut each chicken breast in half to make it thinner and easier to cook. 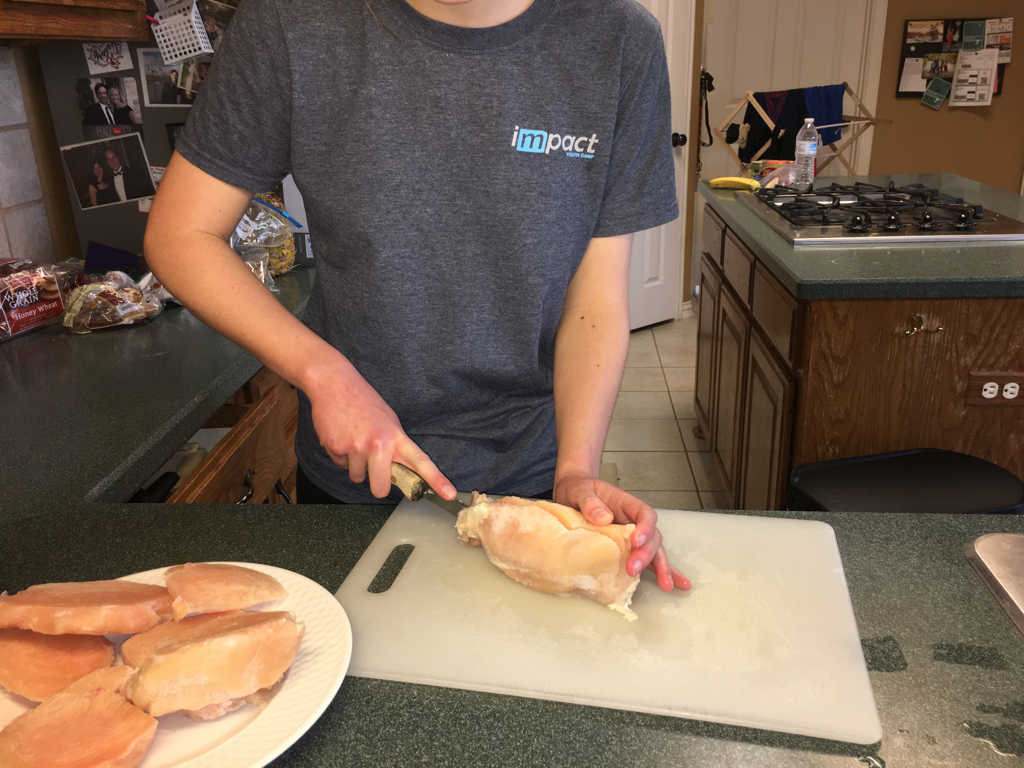 Next, my mom told me to set out two bowls: one with Italian breadcrumbs and one with two eggs (broken and beaten). I then dipped each chicken breast in the eggs and then in the breadcrumbs. Then, I set each chicken breast in the heated frying pan - in which I had poured a small amount of vegetable oil. After dipping each chicken breast and placing each one in the frying pan, I watched them until they were golden brown. My mom explained this to me: the chicken was going to go in the oven, so it only needed to be seared in the frying pan - not cooked all the way through. Once each chicken breast was golden brown, I set them one by one on a plate layered with a few paper towels. Following my mom's instructions, I used paper towels to press out a large amount of the grease and oil from the chicken. If I had done this on my own, I would not have thought to do this. It's neat learning to make something the way I've grown up eating it, instead of from a cookbook that doesn't have those instructions. 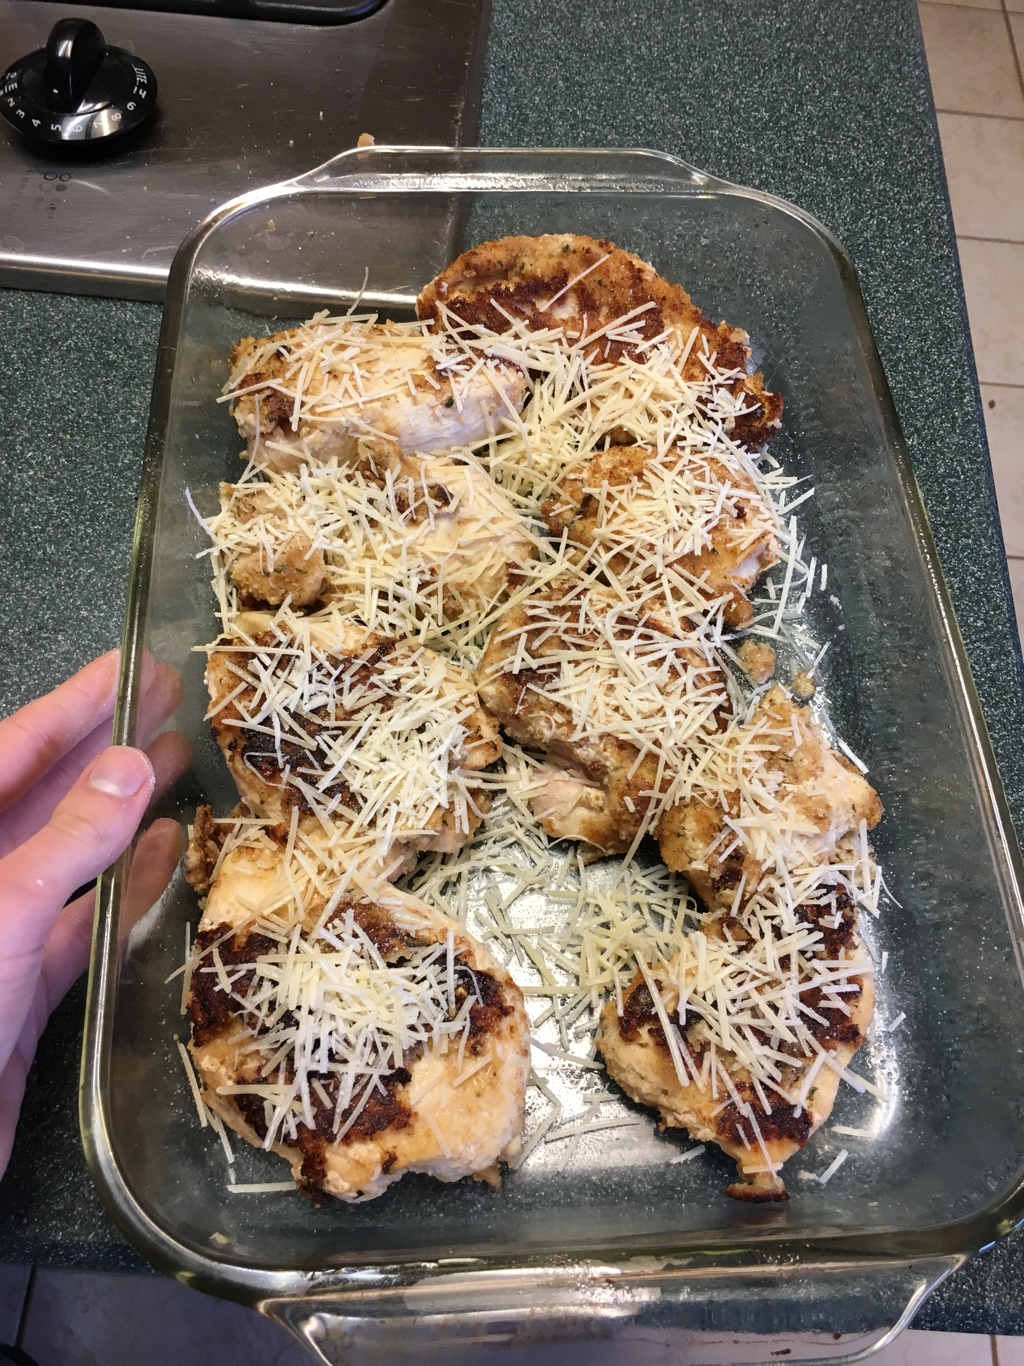 After removing the grease from the chicken, I set each one in a 13x9 glass pan (after spraying it with a non-stick cooking spray). Then I topped it with Parmesan cheese, covered it with foil, and placed it in the refrigerator to be cooked the next night. After handling raw chicken, my mom explained the process she used to "de-chicken" the kitchen and prevent the spread of any diseases. I used 409 antibacterial kitchen spray to wipe down all of the counter tops and the kitchen sink. In addition, I rinsed all of the dishes we used with antibacterial dish soap before placing them in the dishwasher. 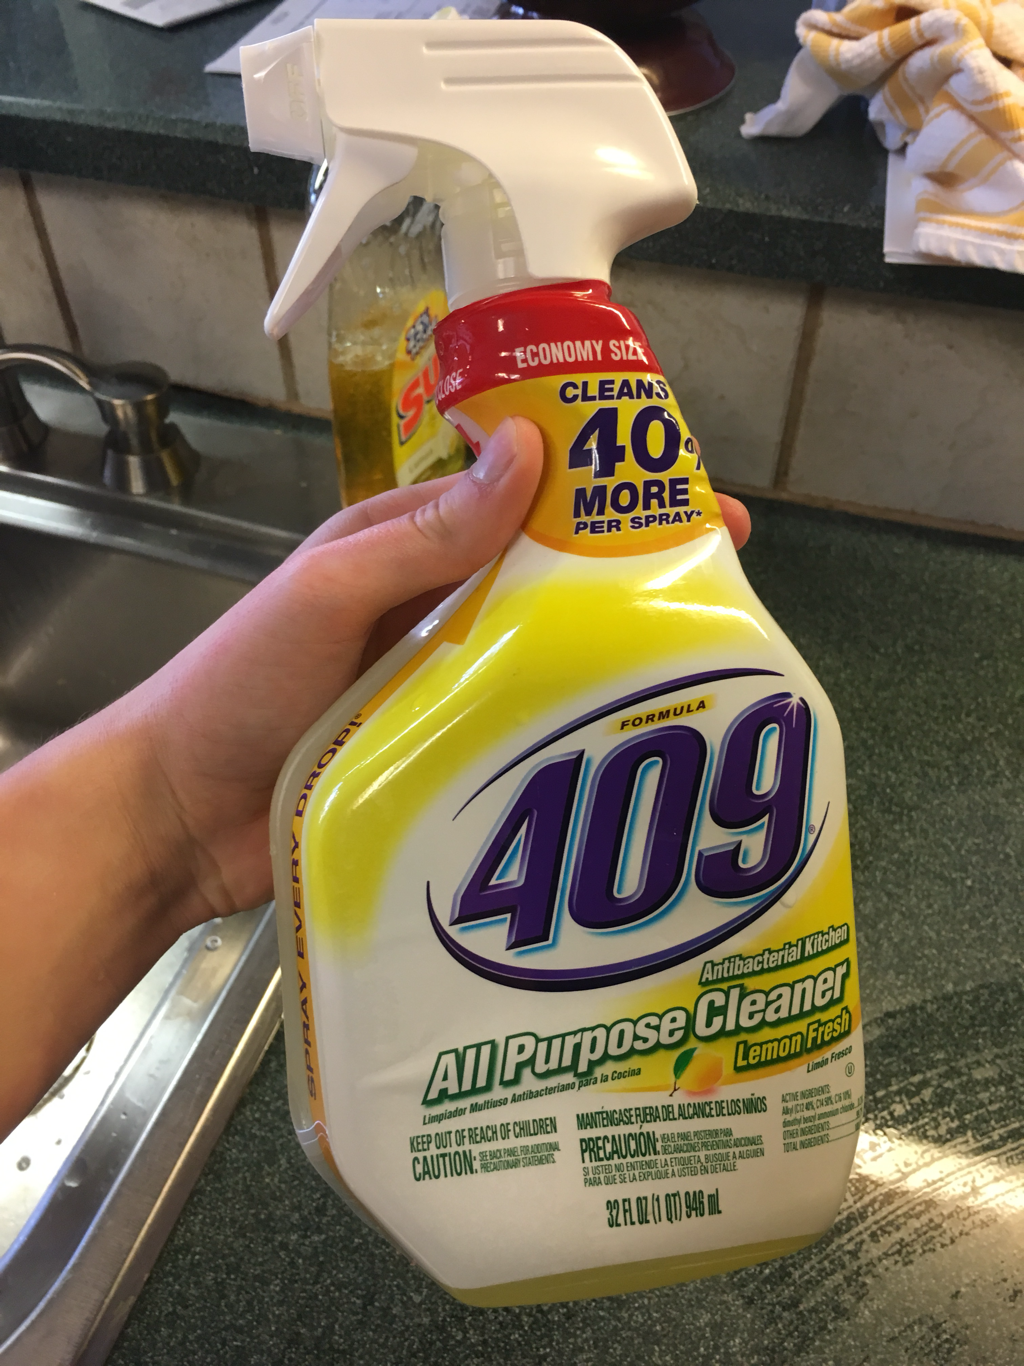 To cook the asparagus, I first washed them under the sink. My mom explained how to cut them: the bottom of the asparagus stalks are very hard to difficult to chew. She showed me how to stick my fingernail into the stalk - and then cut off the bottom of the stalk where it is too stiff for my fingernail to penetrate. I then cut the remaining part into two pieces - to make it easier to cook and eat, my mom explained. 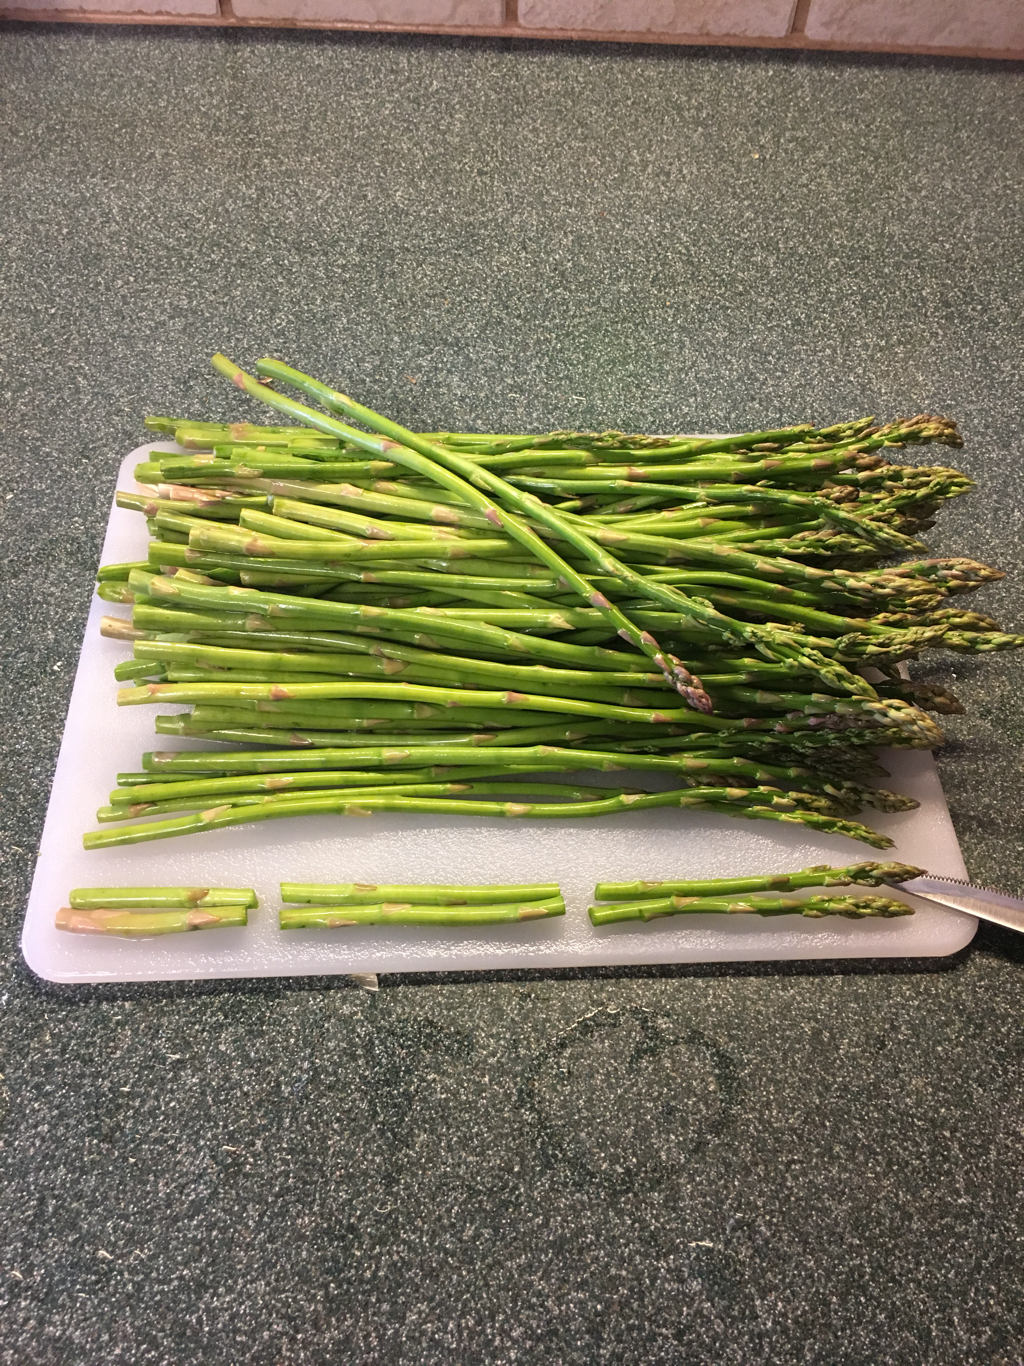 I then put the asparagus in a plastic container in the refrigerator to be used on Monday night. When it was time to eat the meal, I first set the oven to 400 degrees Fahrenheit. I then covered the dish of chicken with canned Italian tomatoes (drained of liquid) and canned pasta sauce. I then set the chicken in the oven for about 40 minutes. While the chicken cooked, I placed the asparagus in a steamer in a pot - with about an inch of water in the bottom. I turned the stove on high, and waited until the stalks were softer (about 10 minutes). While the asparagus cooked, my mom taught me how to make noodles (I sort of knew how to do this - but I wasn't sure). First, I put a pot of water on the stove on high heat. Once it was boiling, I put in Angel Hair spaghetti (broken in half - my mom explained - to make it easier to eat) and turned the stove down to medium heat. The noodles were done in about 8 minutes. I felt really accomplished when I served this meal to my family. It was neat to be able to recreate a dish that I had always loved. Learning this through experience was much different than if I had tried to learn by reading the recipe online. With my mom teaching me, I learned many "side lessons" - like how to sanitize the counter tops after handling raw meat, how to cut asparagus, and how to time out cooking the food so that everything is done at about the same time. I really enjoyed this, and it was easier than I thought it would be - and also so much more rewarding! 
0 Comments
After truly starting on my project, I've discovered several ideas that I'd like to explore through my experiences:
In addition to learning about these ideas through my experiences, I might consider doing a survey among my peers to research these ideas. In addition, I want to add several new aspects to my project:
Starting Out My dad has been wanting to teach me a few things about my car for a while, so this Saturday we spent about five hours to accomplish several tasks. Changing a Flat I'm not going to lie - this overwhelmed me more than anything. I did some research online, and it seemed like a very difficult process. However, as we got started, it was easier than I thought. 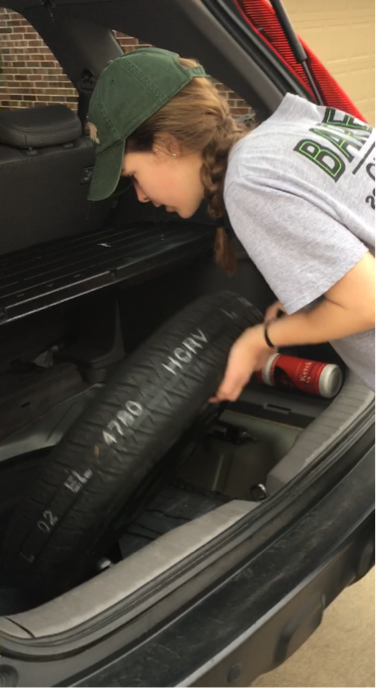 First, we parked my car on a level surface (the driveway). The level surface keeps the car stable. Next, I opened the back of my car to look for the spare tire. The spare tire was not on the side wall - as I have seen in other cars - but instead it was underneath the storage area. I had to lift the cover and unscrew the bolt holding in the tire. To remove the jack, I twisted the end in a counterclockwise direction to make it small enough to remove from its tight storage area. To determine the correct location to place the jack, my dad instructed me to look in my car's instruction manual. For the front left tire, the correct location for the jack was directly behind the tire, supporting a secure metal frame. I put the jack in place, and used the end of the lug wrench to turn the jack and raise it up. 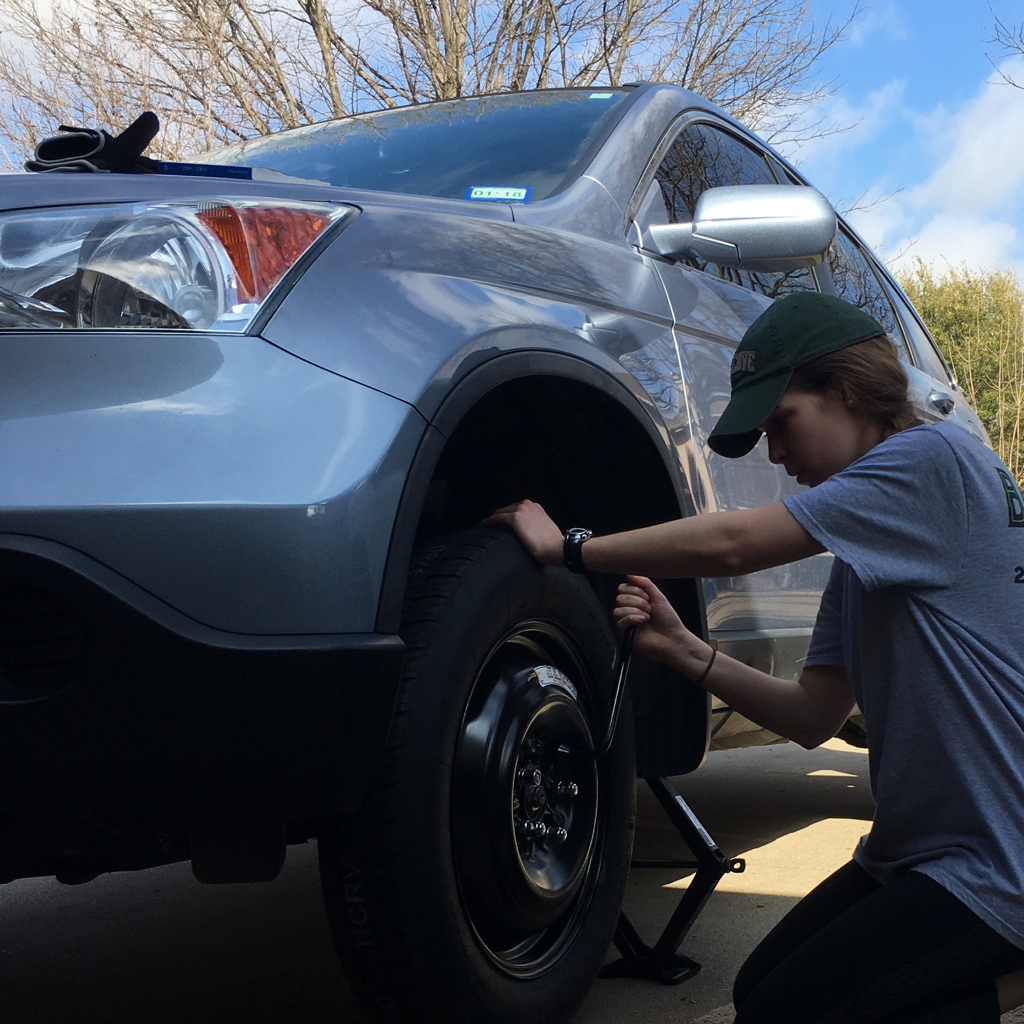 I got the jack in position, but did not yet raise it up to the extent that it supported the car's weight. First, I used the lug wrench to loosen each lug nut on the tire. I learned that each tire has one lug nut with a lock - which is unique to the car and can only be unscrewed by a special (?). I was surprised by how much force it took to unscrew each one. When I couldn't unscrew the bolts with my arms, my dad instructed me to put the wrench in a somewhat horizontal position and then stand on it. I thought that would do it - but I had to really kick at it to rotate the wrench. After loosening each lug nut, I then began to crank the jack to a height that would support the car. One thing I wouldn't have known without experience: After expanding the jack - and after I noticed the left side of my car raise up considerably - I thought I was ready to remove the tire. I had started to unscrew the lug nuts when my dad stopped me. He pointed out that the tire needed to be off the ground (so that there was no weight on it at all) before I could remove it. I had to raise it up considerably higher than I originally expected. After raising the car to a safe height, I completely unscrewed the lug nuts holding the tire in place - and set them aside in a safe place where I could find them again. After that, the tire came off easily. However, lining up the spare and lifting it was not quite so easy. My dad showed me how to visually line up the top screw with the top of the spare tire, and then quickly lift it and put it in place on the screws. 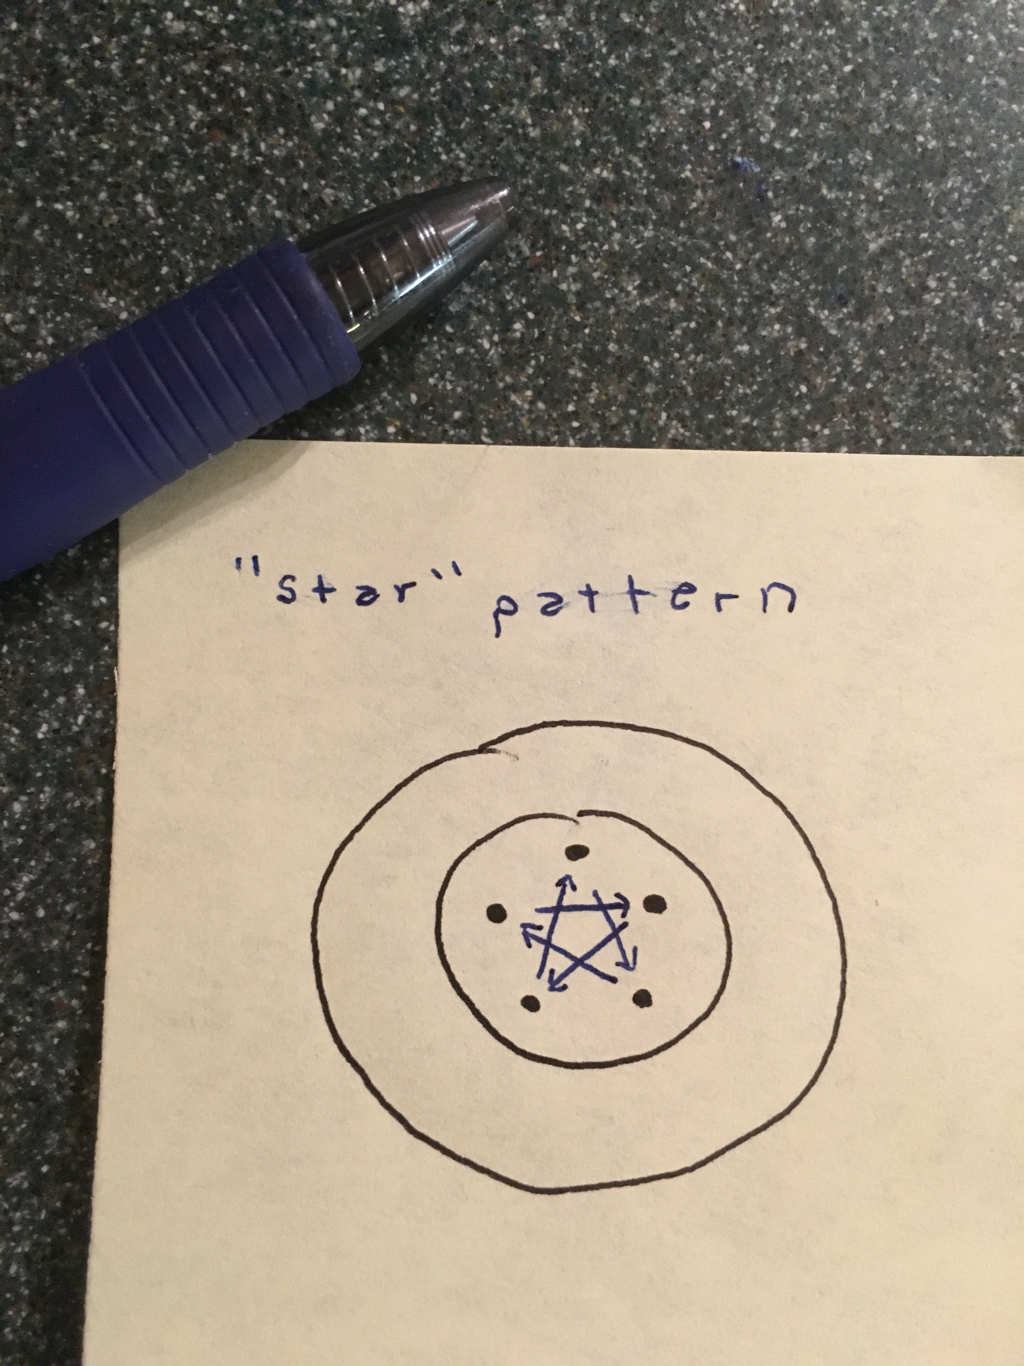 To tighten the screws (I learned this from the manual, and with more detailed instruction from my dad) you can't tighten them in a random order. The lug nuts must be tightened in kind of a "star" shape. After mostly tightening one lug nut, do the same for the lug nut exactly opposite. Continue until all five lug nuts are mostly tightened. Next, return to each lug nut and fully tighten it (using the same "star" pattern). I also learned from my dad that, in order to insure that the tire goes on tightly, you have to push on the bottom side of the tire while screwing the lug nuts. After ensuring that all five lug nuts were tightly screwed on (I stood on the lug wrench again to fully tighten them), I put the good tire in my car, and lowered the jack. Another thing I learned from my dad that I didn't find online: When lowering the jack, make sure to stay clear of the car. The car's weight shifts, and could cause an injury if it fell on someone. Overall, this task was the most challenging, but it was definitely easier than I thought it would be! I was able to do it with my own strength (which I didn't think was going to be possible). I had an idea after completing this. This task took over an hour (partly because my dad and I had several interruptions), and so I am curious to try it again independently and time myself. Ideally, I would like to do two timed trials in order to see an improvement in competence. 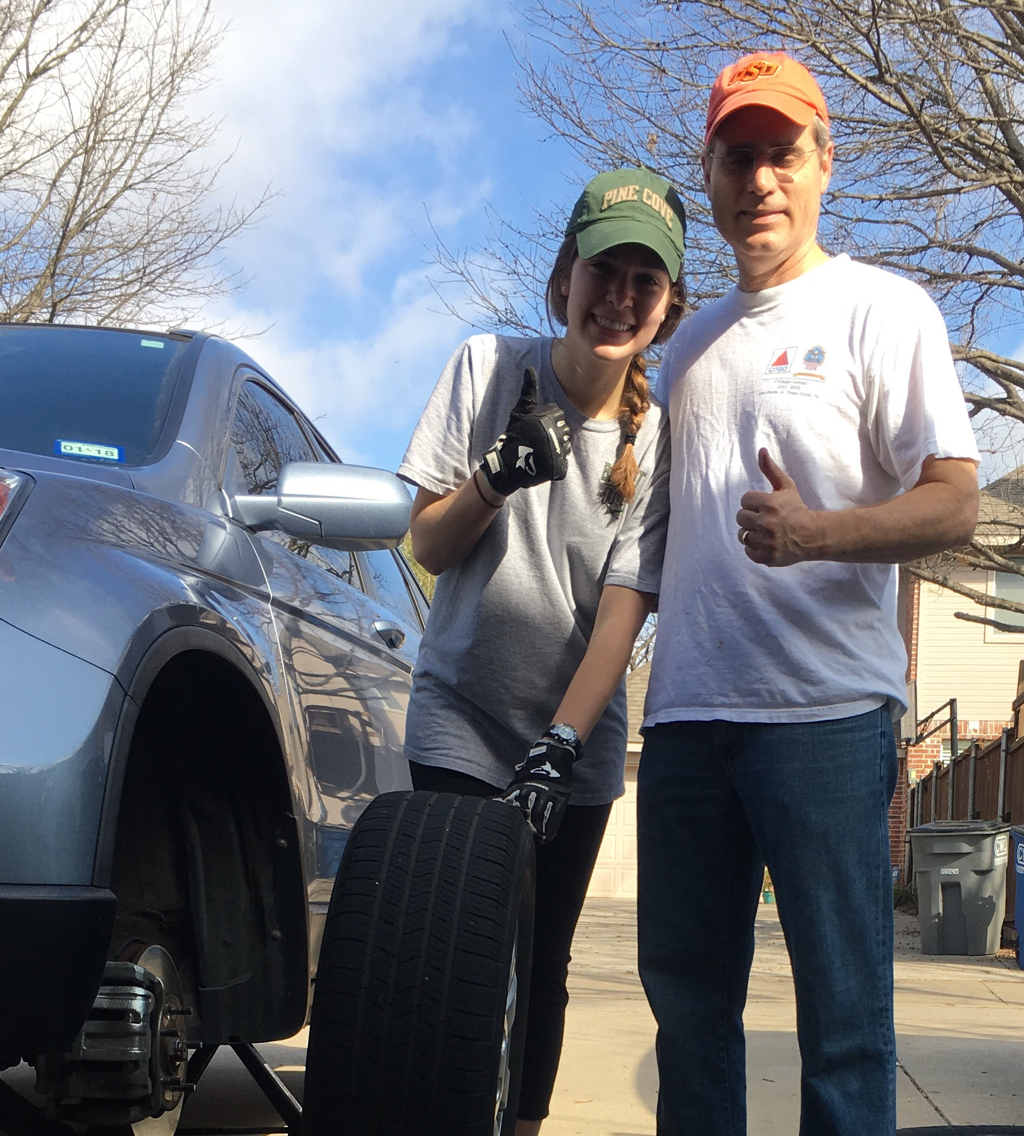 Checking the Oil and Windshield Wiper Fluid I've always been scared of anything under a car hood (I honestly don't know why - I think my older cousins used to tell me that noisy monsters lived there). I was also just kind of overwhelmed and confused by the seemingly hundreds of wires and buttons, and I was scared that I would mess something up. Through this task - I learned to recognize a few items, and I'm not so overwhelmed. I already knew how to raise the hood: use the button inside the car to unlock the hood, pull the latch under the hood to open it, and prop it up. However, the rest was completely new to me. First, my dad showed me how to check the oil. The tank containing the oil in my car is marked with an orange knob. My dad demonstrated how to pull the orange knob, until you completely remove the metal indicator. At the bottom of the (stick?) is a small indicator showing the amount of oil in the tank. To test the quality of it, we got a white paper towel and cleaned the end of it. The oil came off as a maple brown color. My dad explained that the darker it is, the dirtier it is. Black oil would indicate that an oil change it needed. But as the oil in my car was lighter in color, no further action was needed. 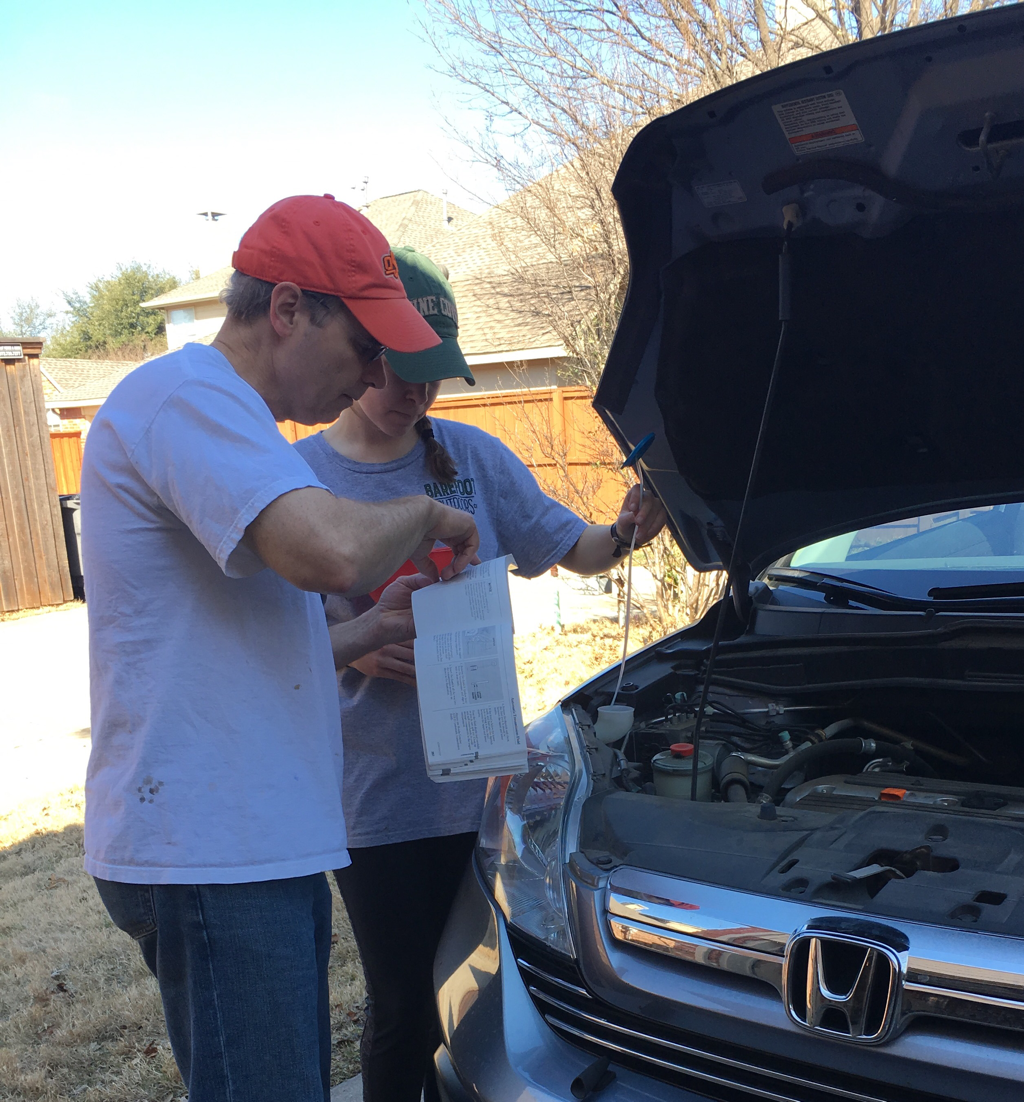 The jumper cables have two wires - one connects to both positive ends of the batteries, and the other connects to both negative ends. Messing that up could be dangerous. In addition, after connecting the cables to one battery, keep the positive and negative clamps on the opposite end separate. My dad told me to try touching them together - and as I did the circuit was completed and sparks flew. I connected the jumper cables to both cars. We didn't actually "jump" one of the cars, because both of the batteries were fine, but my dad explained the procedure. First, get the car with the "good battery" running. Then, connect the jumper cables to both car batteries. Wait a few minutes while the weak battery charges. Then, try to start the car with the "weak" battery. After both cars are running, disconnect the jumper cables (while keeping the positive and negative ends separate). 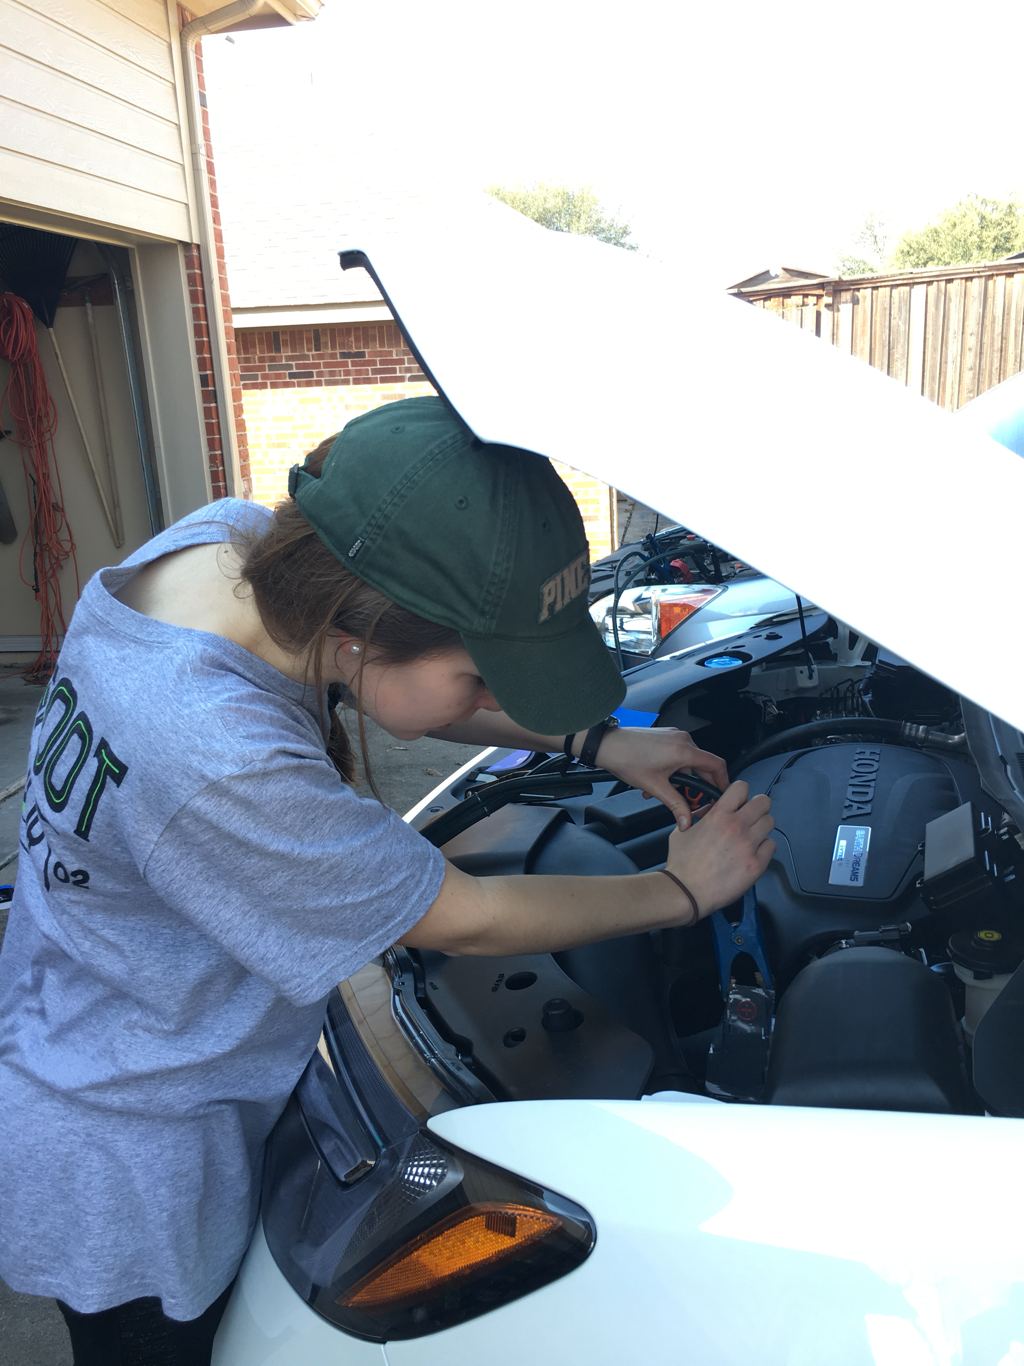 Waxing a Car Literally the only prior knowledge I had regarding waxing a car was (1) that my car needed it and that (2) in "Karate Kid" the teacher tells him to "wax on, wax off." Turns out, there wasn't too much more to it than that. First, my dad explained to me why waxing my car is important. The wax protects the paint, and makes it last longer (so I guess you could say it saves money in the end). My car is exposed to the sun and different weather conditions since I park outside, so it is important that it have something to make it last longer. My dad said that I should do it twice a year. So far, I've had my car for two years and I haven't waxed it - so this was well overdue. First we had to wash the car. I had already done this before, so it was easy: hose it down, rub it down with a sponge with dish soap, rinse off the soap, then towel dry. To begin waxing, the car surface had to be clean, dry, and cool. I had to move my car into the shade. Next, we got sponges and used it to spread the wax all over the car's painted surfaces. The wax had to be spread in a very thin layer. My dad looked over my work several times and each time instructed me to make the wax thinner - which is something I never would have known unless I had experienced it. After letting it sit for about thirty minutes, we got old rags and wiped off all of the wax. My car looked so much better! I hope I can continue to do this in the future, so that I can save money by keeping my car nicer for longer. 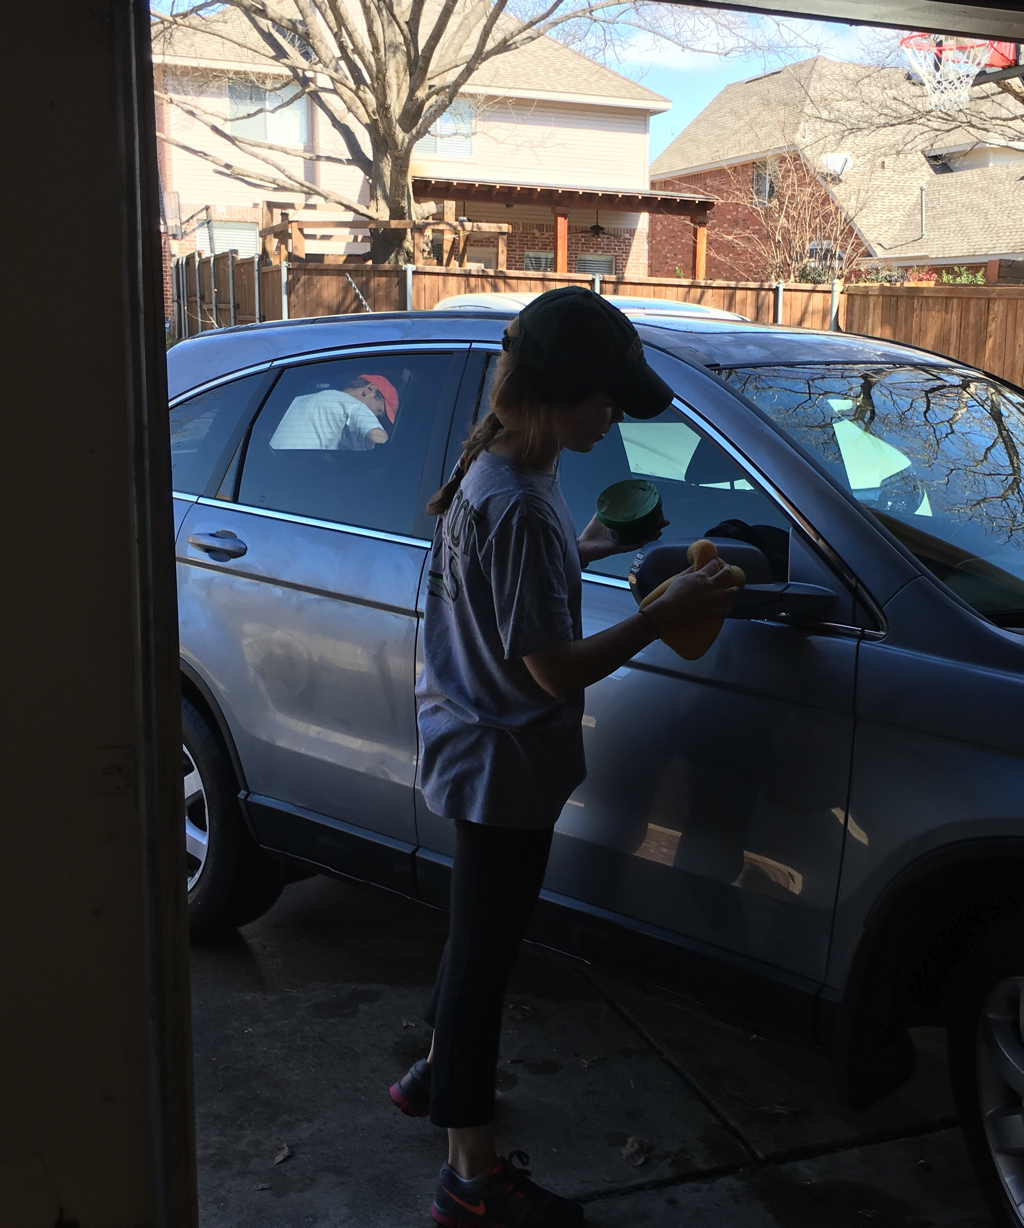 Takeaway
I had a lot of fun doing this with my dad. We got to spend a lot of time together. He has been wanting to teach me these things for a while - we just needed to set aside a time to do it. He also laughed at some of my ignorant quips (like calling the lug wrench a "screwdriver"). After doing all of those tasks, I recognized the need to keep work gloves and some old towels in my car - something I wouldn't have done if I hadn't had the experience. And - just like all of the other tasks I've done - although each was challenging, none was as difficult as I expected. I feel much less unease than I did before. I've come to realize that half of the fear or the intimidation in trying something new lies in the unknown. It's not that the task is actually scary or overly difficult, but somehow the ignorance brings on fear. I didn't know how to light a water heater - much less that you even needed to light it. My dad has had to do this a lot, and so he felt like it was a necessary skill to teach me. One sign that the heater needs to be lit is if water coming out of the tap in the house is cold. This means that the heater literally is not "turned on." My dad explained that the pilot light is a small flame that is always burning - which is then used to ignite the gas in the water heater to create a larger flame and thus heat the water. My dad turned off the light in the attic and had me look through the small "window" at the bottom of the heater to see what the small blue flame of the pilot light looked like. 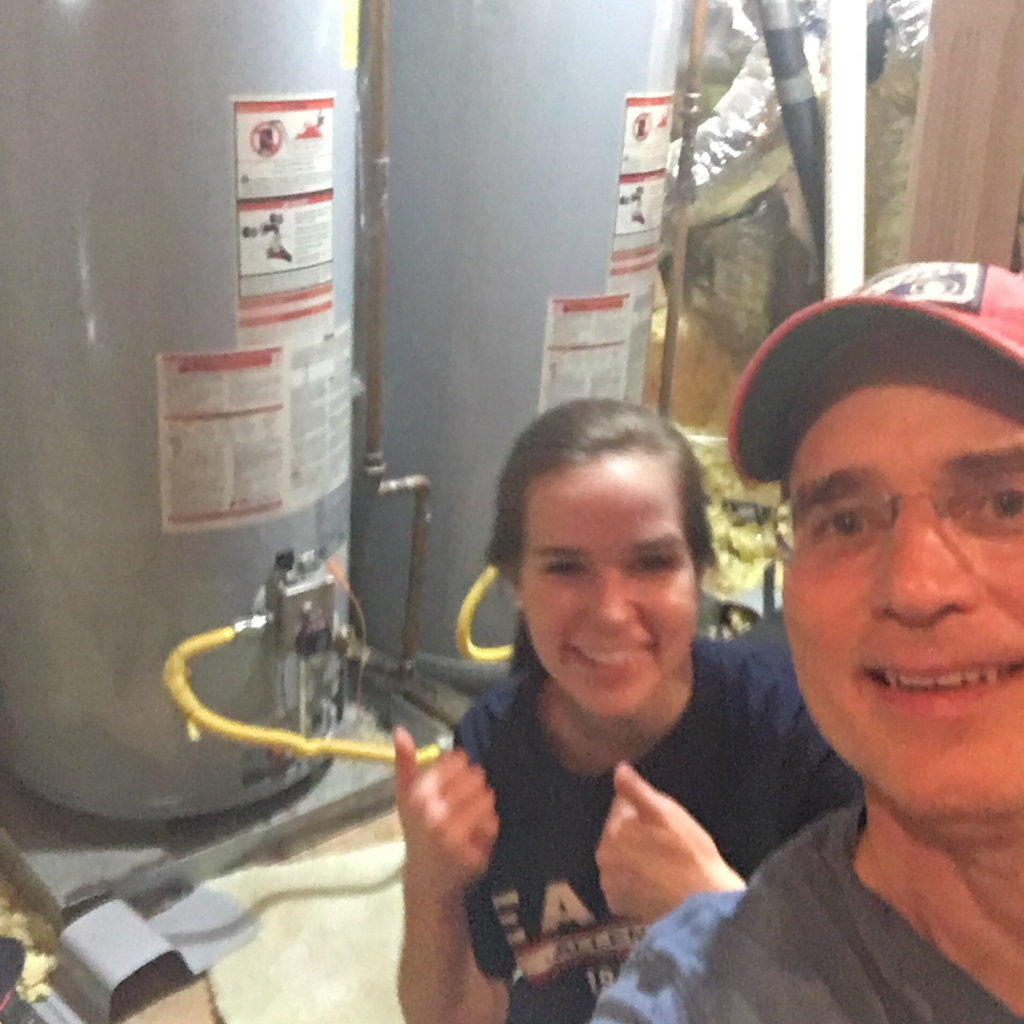 Before lighting the heater, you have to turn off the gas valve. After turning off the gas valve and waiting about thirty seconds for the gas to clear out, find the switch to ignite the pilot light. Press it, and listen for the "click" sound of the ignition. 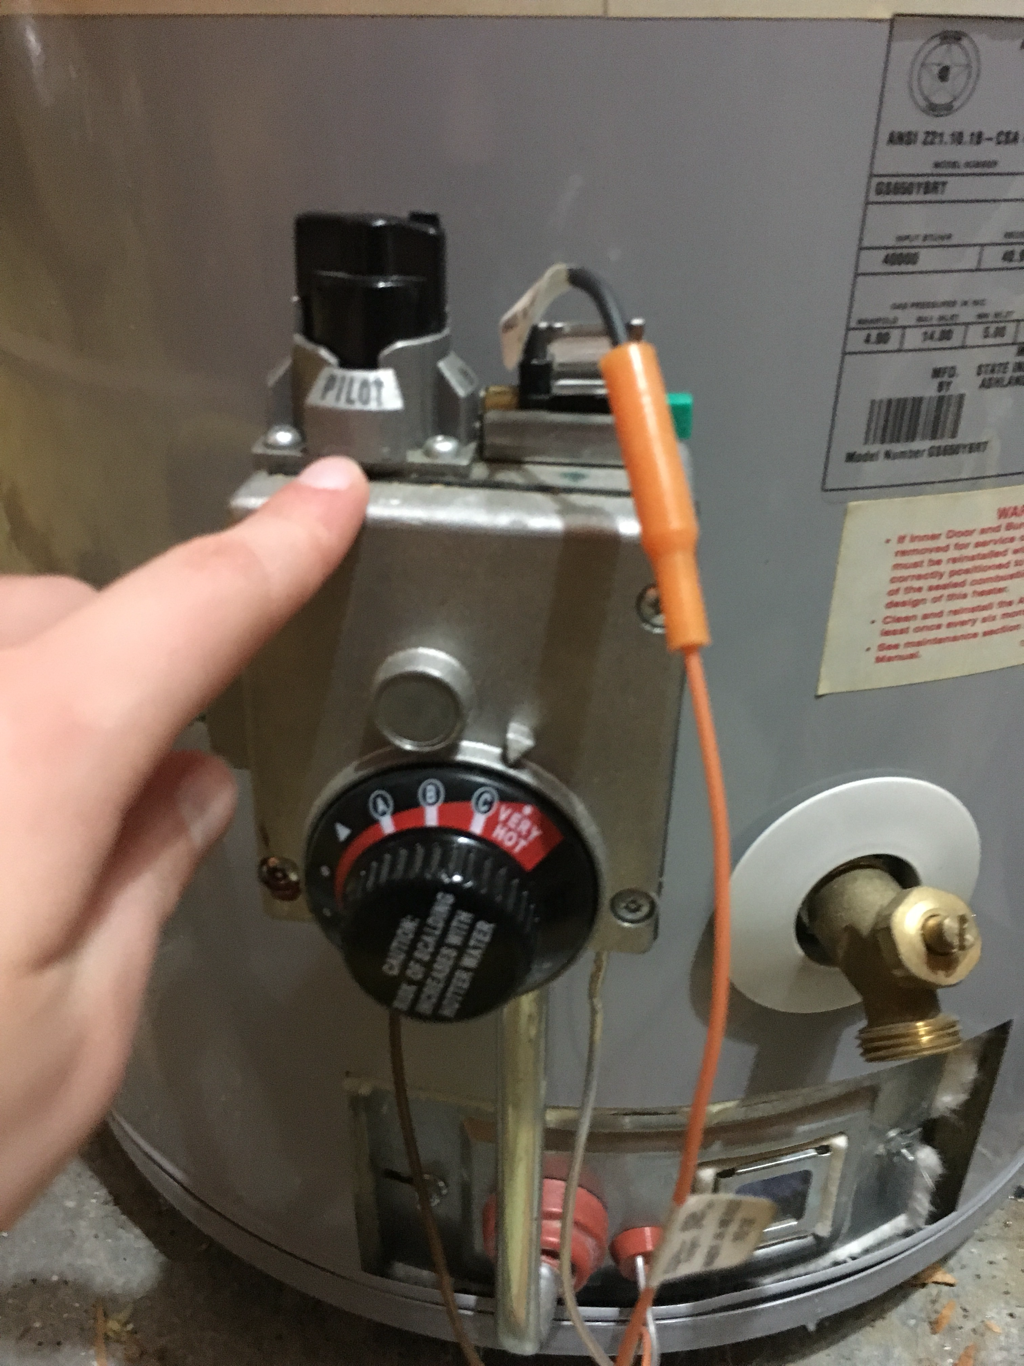 After igniting it several times, my dad turned off the attic light again and had me look inside the water heater. I could see a much larger flame now. Then we switched the gas back on.
I am still confused on exactly how this is done. My dad confirmed the difficulty - he said that the first twenty or so times he did it he had to bring the manual with him and follow it step by step. I might want to try this task again to see if I can understand it better the second time. This task was learned out of necessity: one of our bathroom sinks had stopped draining. This task is important to learn because it will most likely happen in the future in my apartment or home. Rather than pay a plumber, I want to be able to fix it. 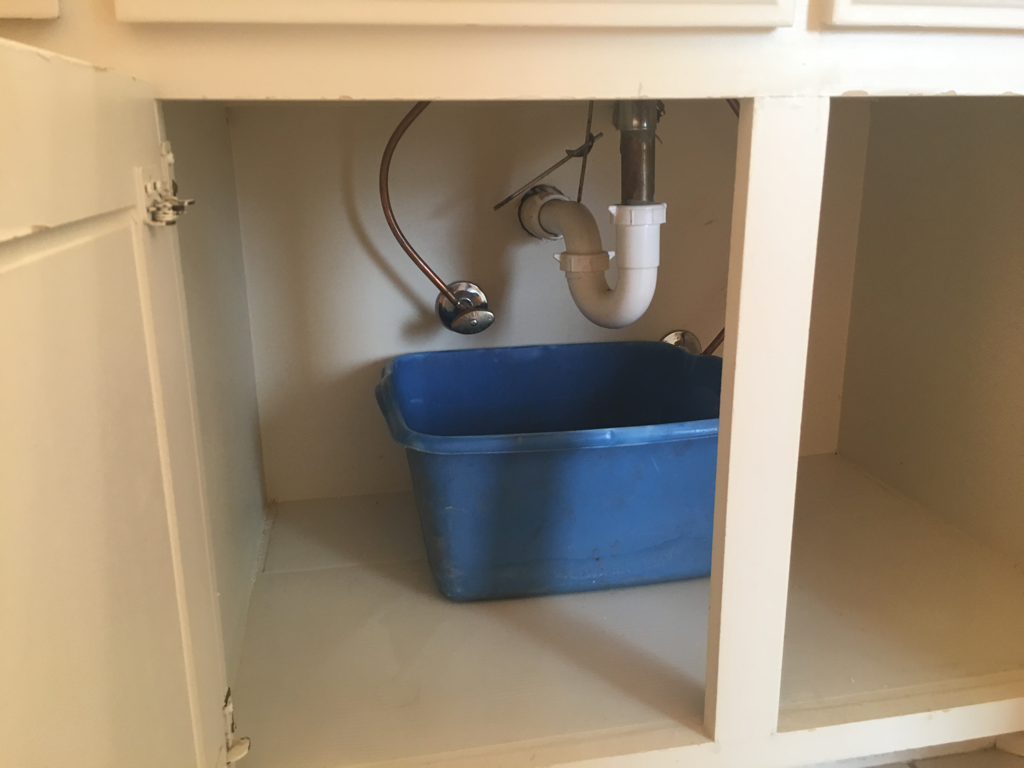 To start, my dad how to remove a pipe from underneath the sink. I placed a bucket underneath the pipe, and then used a wrench to loosen the U-shaped pipe in two places. After loosening it, I was able to unscrew it with my fingers. A small amount of water drained into the bucket as I removed the U-shaped pipe. Next, to remove the items clogging the sink, my dad demonstrated how to bend a wire coat hanger into the right shape and reach up into the pipe. After removing as much as I could through the open pipe at the bottom, all of the water in the sink was still not draining. So, I bent a paperclip in the shape of a fishhook and stuck it through the drain at the top of the sink. I was able to remove everything this way. After completing this, my dad instructed me to turn on the sink again to make sure it drained properly. I did this, and then screwed the U-shaped pipe back underneath the sink. My dad explained how to screw it on a little bit at a time - going back and forth between sides - to ensure that it got screwed on evenly. I then tightened it with the wrench. My dad double-checked that I had sufficiently screwed it on tightly enough. 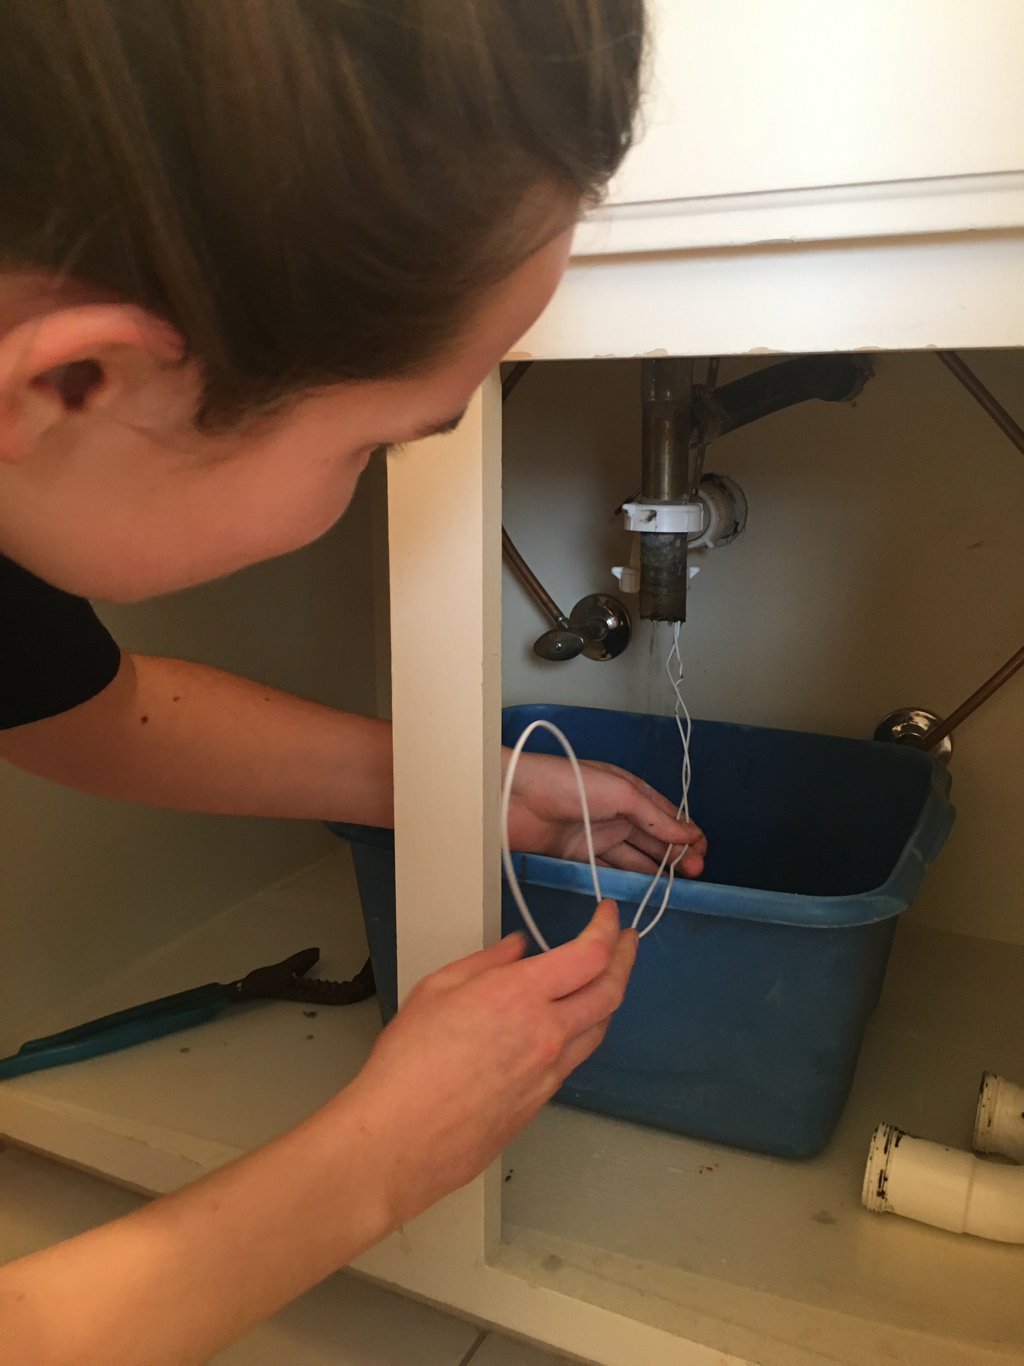 This task was much easier than I expected. I thought it was going to be very difficult, but it wasn't. In a way - I guess it would have been very difficult if I had tried to do it alone. If I had done it alone, I wouldn't have known which pipe to unscrew, how to know when I had sufficiently completed the job, or how to ensure that I had re-attached the pipe correctly. With my dad teaching me how, it went a lot faster because he was there to catch my mistakes or ensure that I was doing it correctly.
|
Archives |
 RSS Feed
